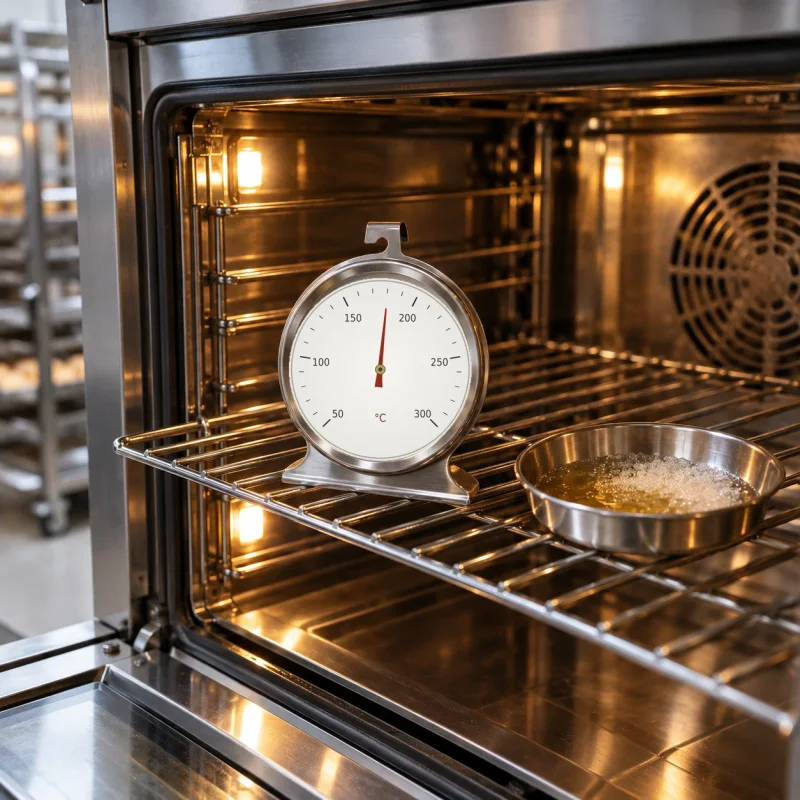
When 180°C on the dial is not the same as 180°C in the oven
The oven signals that it has reached 180°C, yet the edge of a cake darkens before the centre has set. Another day, bread at the same setting stays pale and damp. That does not automatically mean the recipe is wrong. An oven thermostat controls heat by cycling the elements on and off, so air temperature naturally moves above and below the set point.
Do not judge the oven from one snapshot reading. What matters is the average behaviour over several complete heating cycles, followed by a separate check for spatial unevenness. A slow thermometer can look “wrong” simply because it catches a peak or a trough. A suitable oven thermometer is still useful when it is read over enough time and its own accuracy is known.
Calibration can compensate for a fairly constant temperature offset. It cannot fix hot spots, blocked airflow, a failing fan, a damaged seal or a poor pan position.
Choose an instrument that actually measures oven air
Use a thermometer designed to measure air at oven temperatures. That may be a hanging or standing oven thermometer, or a high-temperature digital air probe with its display outside the cavity. Prefer an instrument with a stated accuracy. If the manufacturer does not publish the measurement uncertainty, it is difficult to justify a correction of only a few degrees.
A food probe is not automatically suitable for measuring oven air. An infrared thermometer is different again: it measures the temperature of a surface such as a wall, baking steel, stone or pan, not the average air temperature around the bake.
For a digital probe, confirm that both probe and cable are rated for the intended temperature. Keep the display outside the oven, keep the cable away from heating elements and flames, and do not pinch it against a sharp door edge.
Measure where the bake actually sits
Place a rack at the middle level and position the sensor near the centre of the usable baking area. The sensing part should not touch the rack, wall, door, pan or heating element.
Analog oven thermometers usually respond more slowly, so give them time to equilibrate. A digital air probe can be clipped so that the sensing tip sits a little above or below the rack and is surrounded by moving air rather than touching hot metal.
Remove heavy accessories you do not normally use. Extra metal changes warm-up time and airflow. If you normally bake on a steel, stone or other high-mass surface, run a second test with that setup in place because it changes the thermal environment.
A practical seven-step temperature test
For a baseline test, use conventional top-and-bottom heat at 180°C unless your manufacturer specifies a different procedure.
- Position the oven thermometer or air probe at the centre of the middle rack.
- Start with the oven at room temperature and set 180°C.
- When the preheat signal sounds, keep the door closed and allow roughly another 15 minutes for the cavity and its surfaces to settle into normal cycling.
- Record the temperature every minute, or use automatic logging, until at least three full heating cycles are complete.
- Note the high and low point of each cycle.
- Calculate the average of all evenly timed readings. Use highs and lows to describe cycling range, not as the calibration value.
- Repeat the run without changing oven mode or sensor position.
A multi-cycle average is more informative than one peak or one low. Cycle length and swing vary between ovens. The purpose is not to make the graph flat; it is to learn whether the average at the chosen position is consistently above or below the set point.
Example: at a 180°C setting the oven cycles between 164 and 181°C, while the average of evenly timed readings is 172°C. At that measurement point the oven is running roughly 8°C low on average. The fact that it briefly reaches 181°C does not by itself prove that calibration is correct.
Keep the door closed during the test whenever possible. Opening it releases hot air and triggers an atypical recovery cycle.
Calculate an offset from the average, then verify it
A simple diagnostic difference is:
difference = set temperature − measured average temperature
If the set point is 180°C and the measured average is 172°C, the difference is 8°C. If you compensate manually in a recipe, a setting around 188°C may move the average closer to 180°C, but you must retest rather than assume the relationship is exact.
If your oven provides an electronic temperature calibration or offset, use the procedure and allowed range in the manual for that exact model. Controls differ: some change in small steps, some limit the total correction, and some newer ovens perform their own calibration routine.
After any change, repeat the measurement. Accept the correction only when two runs with the same mode and sensor position give comparable averages and the remaining difference is small enough for the precision your baking needs.
Check at more than one set point, for example around 150, 180 and 220°C. If the error is similar at all three, one offset may be useful. If the oven is accurate at 150°C but 20°C off at 220°C, the problem is not a simple constant shift and deserves model-specific diagnosis or service.
The sugar test is a rough cross-check, not a thermometer
White granulated sugar is mostly sucrose. Sucrose softening, melting and decomposition do not behave like a sharp household calibration switch. Laboratory values for sucrose melting are around the high-180s °C, but heating rate, time, moisture, purity, layer thickness and the test dish all affect what you see. A sugar test therefore cannot tell you that an oven is “exactly 5°C hot”.
If you want a visual comparison, use two separate runs:
- Spread fresh white granulated sugar in a thin, even 2–3 mm layer in a small shallow metal dish.
- In a stabilised oven, test at 170°C for about 15 minutes and note whether the crystals remain loose, clump, lose shape or begin to colour.
- Cool the oven, use fresh sugar and repeat at 190°C.
- Compare the two states. More change at the higher setting is expected, but the exact appearance is not a universal pass/fail standard.
Rapid liquefaction and strong browning at 170°C can be a warning of excessive local heat or strong radiant exposure. No visible change at 190°C after 15–20 minutes does not by itself prove that the oven is cold. Compare the observation with the thermometer record.
Use sugar only as an independent rough check. Use measured temperature behaviour—not sugar—for any actual adjustment.
Correct average temperature does not guarantee even baking
An oven can average correctly at the centre and still have a hot rear corner or a cool zone near the door. After the baseline test, move the sensor to the centre, front, rear, left and right of the rack and compare the behaviour under the same conditions.
Small differences are normal. A large repeatable spatial difference is not fixed by a global calibration offset. Check airflow, fan operation, door seal, rack loading and whether the appliance is level. For the practical effect of oven mode and rack position, see how to choose oven mode, temperature and rack position.
If you regularly bake bread on a stone, steel or in a heavy covered vessel, also test in the real setup. Thermal mass changes recovery, radiation and local temperature around the product.
Do not “calibrate away” the difference between convection and conventional heat
Convection increases heat transfer at the food surface, so the same measured air temperature does not necessarily produce the same baking result as conventional heat. Recipes written for conventional ovens often need a lower convection setting, but the exact reduction is model- and product-dependent, and some ovens apply an automatic conversion.
A calibration offset is meant to address a consistent control error. It is not a substitute for choosing the correct heating mode.
When adjustment is no longer enough
Service is sensible when temperature drifts continuously in one direction after stabilising, an element does not switch off correctly, the required correction is outside the model’s allowed calibration range, or the error changes dramatically between low and high set points.
The same applies when left and right sides differ strongly and repeatedly, the fan stalls, the door does not seal, or a temperature sensor is visibly damaged. An offset can hide a symptom; it cannot repair a failed component.
When you finish, record three things: the measured average at roughly 150, 180 and 220°C, the oven mode, and the sensor position. That simple temperature profile is far more useful for future cakes, bread and cookies than guessing from one dark edge.
Frequently asked questions
Answers to common questions
How often should I check my oven temperature?
Retest when baking results change consistently, after service or moving the appliance, or whenever you suspect a meaningful temperature error.
Can I use a meat thermometer to check the oven?
Only if its manufacturer explicitly allows air measurement at oven temperatures. A food probe without the correct range, support and heat-resistant cable is not an oven-air thermometer.
Can an infrared thermometer measure oven temperature?
Not the average air temperature. It measures the surface temperature of a rack, stone, pan or wall, which is useful for different questions.
Should the upper and lower cavities of a double oven be checked separately?
Yes. Each cavity has its own sensor and heat-control behavior, so measure and adjust them independently.