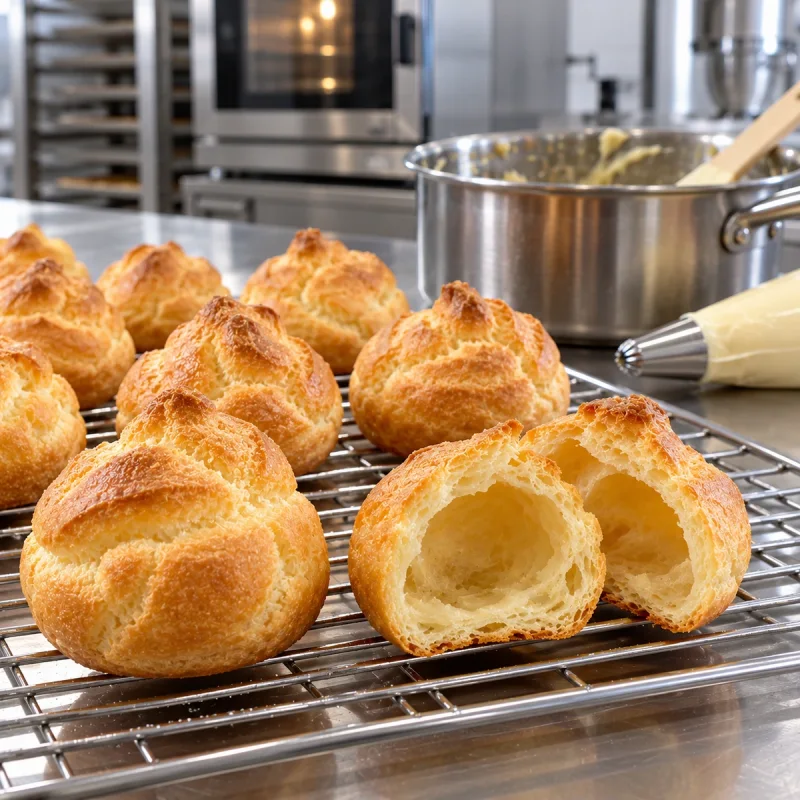
When cream puffs rise in the oven but collapse as they cool
A cream puff can look almost perfect in the oven and then sink into a soft, flattened shell within minutes. Another batch barely rises; another browns beautifully outside while the inside stays wet and heavy.
With choux pastry, these failures are not fixed reliably by adding more baking time or another egg blindly.
Choux works when three things are in balance: the water left in the cooked panade, the amount of egg added, and how thoroughly the baked shell is dried. Steam inflates the pastry, while starch and egg proteins must set the walls in time. If the shell is still damp at the end of baking, its colour can be misleading: as steam cools and condenses, weak walls cannot hold the volume.
So the useful question is not only “how many minutes?”. Watch the dough before piping, its behaviour during baking, and the dryness of the finished shell.
Choux pastry is lifted mainly by steam, not yeast or baking powder
The main leavening force in choux is water vapour.
As water in the dough turns to steam in the hot oven, it expands and stretches the still-soft paste. At the same time, starch that was partly gelatinised while the flour was cooked in liquid and proteins from the eggs begin to set.
The successful transition is:
soft paste → expanded hollow shell → sufficiently dry, firm structure.
If the setting and drying phase lags behind steam expansion, the puff can rise impressively and still fail to keep its height.
The same structural principle appears in other baked foams. PEK’s guide on why sponge cake sinks after baking asks the same core question: did the structure become strong enough before expanding gases and steam started losing volume?
1. Dry the cooked panade enough
The first important decision happens in the saucepan.
When the liquid and fat boil and the flour is added, the flour rapidly binds water and forms a thick paste. Continue cooking and stirring briefly so the mass becomes uniform and some excess moisture is driven off.
Do not chase one exact minute. Look for three practical signs:
- the paste gathers into a smooth ball;
- it pulls away from the sides of the pan;
- a thin film forms on the bottom of the pan.
If you remove the panade too early, it retains more water. It will then need less egg later than a more thoroughly dried panade. If you still add the full nominal egg quantity, the final paste may become too loose.
The opposite is also true: an aggressively dried panade can be unusually firm and may need a little more egg to reach the correct consistency.
That is why egg quantity is not completely independent of the panade. It also depends on how much water was actually lost during cooking.
2. Cool the panade slightly before adding eggs
Do not add eggs while the paste is still hot enough to coagulate egg proteins on contact.
Transfer the panade to a bowl or mix it for a few minutes to release some heat.
If you use a thermometer, below about 52 °C / 125 °F is a useful practical reference before adding eggs. This is not a temperature that needs to be hit to a decimal point; the purpose is simply to avoid adding egg to an excessively hot paste.
If checking with a probe, measure in the panade itself and keep the probe away from the metal wall of the bowl or pan.
3. Add eggs to consistency, not only to a number
This is one of the most important control points.
Beat the eggs together first. Add them gradually, and after each addition wait until the paste becomes cohesive again before adding more.
At first it can look split and slippery. That is not automatically a failure. Keep mixing until the paste becomes smooth and glossy again.
As you approach the end, slow down. Do not pour in the last portion automatically.
Correct choux paste should be:
smooth and glossy, soft enough to pipe, yet firm enough that the piped mound does not spread into a puddle.
When you lift a spatula or paddle, the paste should fall slowly in a thick ribbon and form an elongated V at the edge.
This is not a laboratory threshold, but it is more reliable than “always use four eggs”, because egg size, flour absorption and water loss during cooking are not perfectly constant.
4. Too much egg and too little egg create different problems
If the paste is too loose, the piped mound spreads noticeably before it reaches the oven. It may still expand, but it usually struggles to build a tall, stable cavity.
Likely causes include:
- too much egg;
- a panade that was not dried enough;
- inaccurate weighing of flour or liquid.
If the paste is too stiff, it is difficult to pipe, sharp ridges remain on the tray, and expansion can be limited or uneven.
In that case, too little egg or an over-dried panade is more likely.
Once egg has been added, do not correct an overly loose paste by stirring in random raw flour. That flour has not undergone the same cooking and starch gelatinisation as the rest of the panade.
5. Equal size gives the shells an equal chance to dry
Puffs in the same batch should be as similar in size as possible.
If one is much larger than another, the small one may already be dry while the large one still has a wet inner wall.
Hold the piping bag close to vertical and pipe even mounds. A pointed tip can be pressed down gently with a slightly damp fingertip.
This is not only about appearance. Consistent diameter and height are process control.
6. The first part of baking creates volume; the second must set it
Choux needs enough initial heat for water to turn rapidly to steam and expand the interior.
But rise alone is not success.
Once the cavity forms, the walls need enough time and heat to set and dry so they can support themselves after the pastry leaves the oven and the steam begins to cool.
That is why many methods use stronger heat at the beginning and a lower temperature later for continued baking and drying. The exact schedule depends on puff size, oven behaviour and formula.
The useful principle is:
first generate steam and volume; then give the shell enough time to set and dry.
Why you should not open the oven too early
Early in the bake, the walls of the puff are still soft.
Opening the door sharply lowers oven temperature and steam pressure. A structure that has not yet set can lose support and begin to collapse.
Wait until the puffs have a clearly formed, coloured and visibly firm exterior before opening the oven. Even then, check quickly.
Why cream puffs collapse after baking
The most common mechanism is an inner wall that is still too moist.
A puff may be golden outside and look finished while substantial moisture remains inside. Once it leaves the oven, steam condenses back to liquid. Gas volume decreases, and a damp wall may not have enough mechanical strength to hold the cavity.
The shell then shrinks or collapses.
Colour alone is therefore not a sufficient doneness test.
With a new batch, remove one test puff and cut it open. The inner walls should feel dry and firm, not rubbery, wet or sticky.
If the test shell collapses after cutting, the rest of the batch needs more drying.
A small opening after baking helps steam escape
Once the shells are structurally baked, make a small slit or hole in each one.
That gives residual steam a path out.
Return the shells to the oven briefly or continue drying according to the formula and size you are using.
The purpose is not to make the surface much darker. It is to reduce moisture in the inner walls.
That distinction matters.
Dark outside, wet inside
This usually means the exterior was receiving heat too aggressively relative to the drying rate inside.
Do not solve it only by extending the whole bake at the same high temperature. The outside will darken further while the interior may still dry inefficiently.
Instead check:
the starting temperature, when the temperature is reduced, puff size, and the oven’s actual temperature.
A meaningful oven-temperature error can strongly change the balance between rapid surface browning and slower internal drying.
The puffs spread before baking
This is a strong diagnostic signal.
If a freshly piped mound turns into a wide, low blob within moments, do not blame the oven first.
Check paste consistency.
The main candidates are too much egg, a panade that was not dried enough, or too much starting liquid relative to flour.
Correct paste relaxes slightly after piping but keeps its basic shape.
The puffs barely rise
First check whether the paste contained enough available moisture to create sufficient steam.
An overly stiff paste with too little egg can restrict expansion.
Another possibility is insufficient initial heat. If water turns to steam too slowly, the first burst of expansion is weaker.
Also consider whether the panade was dried much more than usual. In that case, the same nominal egg quantity does not create the same final hydration.
Large cracks are not always the same fault
Choux pastry is naturally irregular. Rapid expansion creates ridges and cracks on the surface.
Some unevenness is therefore normal.
If the shells tear very aggressively and inconsistently, first check whether the paste was too stiff, the piped pieces were very unequal, or the initial heat was unusually aggressive.
Do not correct appearance alone. Check paste consistency first.
Puffs become soft after filling
This is a different problem from collapse after baking.
Creams contain a great deal of water. Once a dry choux shell is filled, moisture slowly migrates from the filling into the pastry.
A perfectly baked shell can therefore soften after several hours.
For a crisper shell, fill cream puffs as close to serving as practical. Empty shells should be completely cool and dry before filling.
The most useful troubleshooting order
When choux fails, do not change five variables at once.
Start with the freshly piped paste.
If it spreads before baking, investigate panade drying and egg quantity.
If it holds shape but barely rises, check consistency and initial heat.
If it rises well and then collapses, suspect a shell that was not set or dried enough.
If it remains tall but is wet when cut open, improve the drying phase.
If it is good after baking and softens only after filling, the problem is no longer the choux process itself but moisture migration from the filling.
That sequence tells you where in the process the failure began. For choux pastry, that is far more useful than blindly adding another egg or another ten minutes of baking.