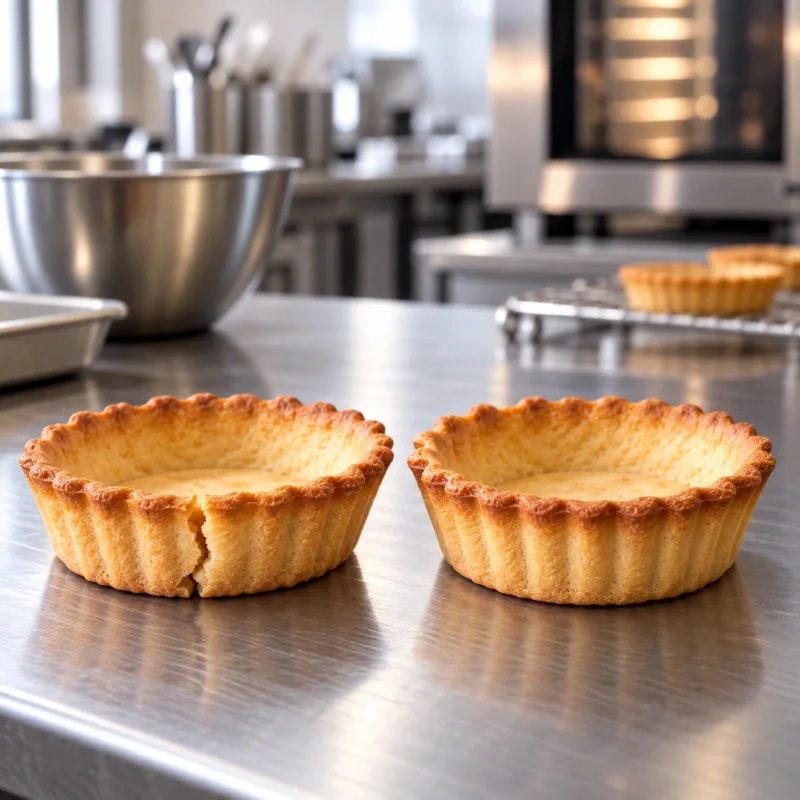
Cracks often start before the tart shell reaches the oven
When shortcrust cracks at the lower corner while you line a small mould, baking is not yet the main problem. The dough is usually in the wrong working state. If it is too cold, it is brittle and fractures as it bends. If it is too warm, it stretches, the fat softens and the walls lose support. That balance between limited gluten development, cool fat and adequate resting is also central to shortcrust pastry technique.
Mini tart shells expose mistakes faster than a large tart. Their walls are thin, and the join between the base and side acts like a hinge. Stretch or thin that area and the stress is released later as shrinkage, a split or a broken corner.
A workable dough bends without a white fracture line and does not leave a greasy film on your fingers. The edge should stay smooth when pressed gently against the mould.
Mix only until the dough comes together
Extra kneading does not make shortcrust safer. It hydrates more flour and develops more gluten, making the dough more elastic. An elastic dough may look easy to roll, but it tends to pull back in the mould and can drag the walls inward during baking.
The dough should be cool but pliable. A dough temperature around 10–16 °C can be a useful orientation for some butter-rich formulas, but it is not a universal target. Butter percentage, sugar, eggs, flour and room temperature all change the workable range. The better test is behaviour: too cold and the dough cracks when bent; too warm and it sticks and loses sharp edges.
Flatten the mixed dough into a disk or rectangle, wrap it and chill for at least 30–60 minutes. If it is rock-hard after chilling, do not knead it again. Let it temper for a few minutes until it rolls without splitting.
Even thickness removes weak spots
For many mini tartlets around 6–9 cm wide, about 2.5–3 mm is a useful thickness. Thinner walls dry quickly and are fragile during unmoulding. Thick patches bake more slowly and create uneven contraction.
Roll evenly with only as much flour as necessary. If the pastry starts to soften, chill it briefly again before cutting. A more detailed guide to this step is available in how to roll out dough without sticking, tearing, or shrinking.
Do not repair a split by repeatedly pressing it with warm fingertips. Patch a small crack with a piece of equally cool dough and smooth the join with one short press.
Fit the base and sides without stretching
With straight tart rings and dough that is firm enough to handle, a separate base disk and side strip give excellent control. Cut the disk to fit the inside of the ring, then cut a strip to the wall height. Set both pieces in place without pulling.
Press the lower edge of the strip lightly against the base so the join is continuous. Do not build a thick rope of pastry in the corner; it bakes at a different rate and can create stress during cooling.
With one-piece mini tart moulds, lower a larger round of pastry into the cavity gradually. Support the dough first, bring it closer to the base from all sides and only then press it against the wall. If you push it straight down, the lower corner stretches and becomes thin.
The dough should conform to the mould. It should not be tensioned across it.
Trim the rim only after the pastry is evenly seated. A ragged, compressed or very thin edge dries faster and is more likely to break.
Re-chilling matters after shaping
The first rest after mixing helps hydration even out and reduces mechanical tension. The second chill, after lining the mould, firms the fat again and stabilizes the shape you have just created.
A 30-minute chill is a useful practical starting point. In a hot kitchen or with a softer formula, a short freezer rest can help. The pastry should be firm, not dried out or covered with frost.
Do not leave thin shells uncovered in the refrigerator for hours. Their rims can dry out and become brittle.
Most importantly, chilling cannot fix pastry that was already stretched too thin. It only makes the stretched shape temporarily firm.
Bake until the lower corner is structurally set
A moderate, stable oven is usually easier to control than aggressive heat. Around 165–175 °C conventional or roughly 155–165 °C fan can be a starting range for some small tart shells, but the correct setting depends on dough formula, mould colour and material, and the real calibration of the oven.
If heat is too low for the method, fat can melt before the pastry sets and the walls may slump. If heat is too aggressive, the rim can colour while the lower corner remains soft. Uneven setting creates stress where the base meets the wall.
Many mini shells bake in roughly 12–20 minutes, but time alone is a poor endpoint. Look for an evenly coloured shell, a dry base and a lower corner that feels set rather than soft and pale.
Perforated rings on a perforated mat often allow steam to escape well and may need no weights, depending on the dough and method. Smooth closed moulds are more likely to benefit from parchment and baking weights during blind baking.
Cooling is part of the bake
Freshly baked shortcrust is still fragile. The fat is hot and the structure has not fully stabilized, so forcing a shell out immediately concentrates stress at its thinnest point.
Let the tartlets rest in the moulds for a few minutes, then unmould gently and cool completely on a flat rack. With rings, lift vertically rather than twisting.
A small surface crack can sometimes be sealed before a final short bake with a very thin egg wash. A deep crack that would leak a fluid filling needs a raw-dough patch before baking. After a shell is fully baked, chocolate or cocoa butter can seal a leak, but it does not restore the lost structural strength.
Before filling, inspect the shell against the light. The base should look even, the base-to-wall joint continuous, and the rim should not crumble under a light touch.
Diagnostics
Common problems and solutions
The dough cracks while lining the mould and white fracture lines appear at the corner.
Cause: The dough is too cold; the butter is hard and the pastry is not pliable enough to bend.
Solution: Let the dough temper for a few minutes. Shape it as soon as it bends without a white fracture line but before it becomes sticky.
A crack opens between the base and the side after baking.
Cause: The pastry was stretched, thinned or poorly joined at the lower corner.
Solution: With straight tart rings and firm dough, use a separate base disk and side strip, pressing them together gently without pulling or building a thick ridge.
The top edge crumbles or breaks when the shell is removed.
Cause: The rim is too thin, too dry, or the shell was unmoulded while very hot.
Solution: Keep the rim even, rest the baked shells briefly, and lift rings straight up rather than twisting them.
The sides slump and the lower corner becomes thin and cracked.
Cause: The lined pastry was not chilled enough, or the fat melted before the structure set.
Solution: Chill the lined shells thoroughly and bake in a fully preheated oven. Use weights where the mould and method require them.
One side is dark and hard while the other is pale and soft.
Cause: Heat is uneven or the moulds are crowded or too close to an oven wall.
Solution: Leave space for airflow, bake near the centre of the oven, and rotate only after the pastry structure has begun to set.
Technical terms
Terms worth understanding
- Dough pliability
- The ability of pastry to bend and fit the mould without cracking, stretching or sticking.
- Gluten development
- The linking of flour proteins during hydration and mixing; too much development makes shortcrust elastic and prone to shrink.
- Blind baking
- Baking an empty tart shell before filling it, often with parchment and weights to support the base and sides.
- Structural setting
- The stage during baking and cooling when starches, proteins and fat form a firm shell.
Frequently asked questions
Answers to common questions
Do I need to grease mini tartlet moulds?
Well-chilled butter-rich dough in good metal rings often needs no extra grease. Closed or worn moulds may benefit from a very thin, even coating; excess grease can encourage the sides to slide.
Should I dock mini tart shells with a fork?
Dock the base lightly when it is baked without weights on a smooth, non-perforated surface where steam is more likely to lift it. Use only small, evenly spaced holes so a liquid filling cannot easily leak through.
Why does the pastry still shrink after chilling?
Chilling cannot erase tension created by overmixing or stretching the dough into the mould. Mix only until combined, avoid pulling the pastry during lining, and give it both resting stages.