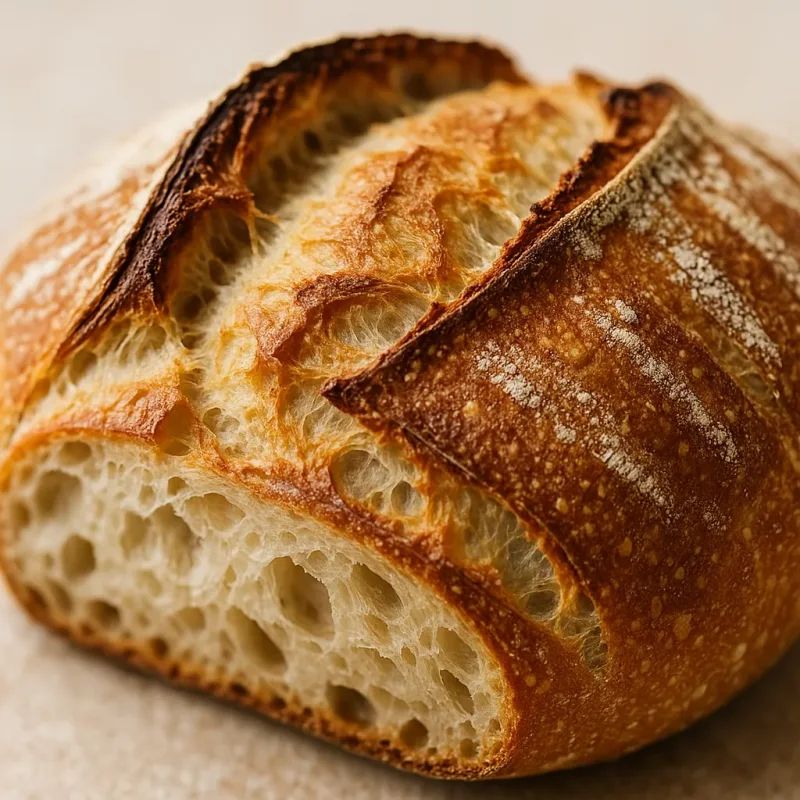
A crisp crust needs two different baking environments
If your loaf looks great when it leaves the oven but turns soft soon afterward, the fix is usually not “stronger flour” or a longer cold proof. A crisp crust depends mostly on how moisture is managed during baking and cooling.
Early in the bake, moisture is helpful. The loaf is expanding rapidly, and steam keeps the surface flexible instead of letting it set too soon. Later, that same moisture becomes the enemy: the surface has to dry and brown.
The useful rule is simple: steam early, finish dry.
What steam actually does
During oven spring, the loaf expands quickly. A dry surface can firm up before that expansion is finished. Steam delays that setting and also supports surface starch gelatinization, which contributes to the thin, glossy structure associated with many crusty hearth breads.
Once oven spring is mostly over, the baking environment should become drier. That is when the crust loses moisture, browns more deeply, and becomes brittle rather than leathery.
1. Preheat the oven and the baking surface thoroughly
Hot air alone is not enough. A Dutch oven, baking stone, steel, or heavy sheet pan needs time to store heat.
For many rustic wheat loaves, 230–250°C / 445–480°F is a useful starting range, but the recipe, loaf size, and real oven temperature matter more than one fixed number. If the bottom stays pale and soft, an underheated baking surface is a common cause.
2. Provide steam right when the loaf goes in
A covered Dutch oven or bread cloche is the most repeatable home method because it traps moisture released by the dough itself.
If you create steam directly in the oven, use only a method approved for your appliance. Do not throw or spray water onto glass, lamps, or components that can be damaged by thermal shock.
3. Vent the steam after the main oven spring
For many medium-size artisan loaves, removing the lid after roughly 15–20 minutes is a good starting point. Smaller loaves may move to the dry phase sooner; larger loaves later.
The important part is the transition, not the exact minute. Leaving the loaf in a humid environment for the whole bake works against a crisp finish.
4. Do not stop at the first hint of browning
A pale crust is often less flavorful and holds more moisture. Rustic bread usually benefits from an even golden-brown to deeper brown finish.
If the crust gets dark while the center still seems underbaked, lower the temperature and extend the bake rather than pulling the bread early.
5. Use the final minutes to dry the surface
If the color is good but the crust still feels pliable, finish without added steam. Depending on the oven, a short period of convection can help drive off surface moisture. Cracking the oven door is only appropriate if the manufacturer allows it.
The goal is not to dry out the crumb. It is to remove excess moisture from the crust.
6. Cool on a rack, not on a solid surface
Freshly baked bread continues releasing water vapor. On a board or tray, that vapor collects under the loaf. Wrap the bread while it is still warm and the whole crust is exposed to a humid microclimate.
Move the loaf to a rack immediately. Give a larger loaf at least about an hour before slicing; very large loaves need longer.
7. Cold fermentation improves flavor, not crust by itself
An overnight or refrigerated proof can develop flavor and make your schedule easier. It can also influence dough handling and blistering. But it does not guarantee crispness.
A cold-fermented loaf still turns soft if it stays humid too long in the oven or is not dried enough at the end.
8. Flour strength is not the same as crust crispness
Higher-protein flour can support stronger gluten and better loaf volume. That is useful, but it does not directly create a crisp crust.
Steam management, heat, bake duration, loaf thickness, and moisture loss have a more immediate effect on the crust. Whole-grain and rye flours change water absorption and structure, so their ideal bake may differ.
9. Score immediately before baking
Scoring gives expanding dough a controlled place to open. Without an effective score, pressure may force the loaf to burst along the side or base.
Use a very sharp blade. The depth and angle depend on loaf shape and the kind of opening you want.
10. Keep the crust out of a moisture trap after baking
Plastic softens a crisp crust quickly because it holds moisture. If you need to store bread longer, let it cool completely and freeze it. A brief reheat in a hot oven after thawing can restore much of the crisp texture.
Troubleshooting at a glance
| Symptom | Likely cause | What to change |
|---|---|---|
| Pale, soft crust | Not enough dry baking | Bake longer after steam is removed |
| Crust softens in 20–30 minutes | Moisture is trapped during cooling | Cool fully on a rack |
| Soft bottom crust | Baking surface was not fully heated | Preheat stone, steel, or heavy pan longer |
| Dark crust, damp center | Heat is too high for loaf size | Lower temperature and extend the bake |
| Side blowout | Under-proofing, weak scoring, or too little early steam | Check proof, score, and early steam |
| Very thick, hard crust | Dry phase is too long | Shorten the final dry bake |
The most repeatable home method
For one loaf, a preheated Dutch oven removes many variables. Load the proofed and scored dough, bake covered for the steam phase, remove the lid, and finish uncovered until the crust is deeply colored and dry. Then cool completely on a rack.
No Dutch oven? The same physics still applies: strong stored heat underneath, moisture early, dry heat late, and unrestricted airflow while cooling.
Frequently asked questions
Answers to common questions
How do I create enough steam for a crisp crust at home?
A covered Dutch oven or bread cloche is the most repeatable option because it traps moisture released by the dough. If you add steam another way, use only a method that is safe for your oven model.
When should I remove the lid or vent the steam?
For many medium-size artisan loaves, around 15–20 minutes is a useful starting point, once most oven spring has occurred. Then finish in a dry oven until the crust is deeply colored.
Why does my crust soften as the bread cools?
Moisture moves from the crumb toward the surface during cooling. If it is trapped around the loaf, or the crust was not dried enough, the crust softens. A drier finish and rack cooling help.
Do I need high-protein flour for a crispy crust?
Not necessarily. Higher-protein flour mainly affects gluten structure and loaf volume. Steam management, temperature, bake time, and moisture loss have a more direct effect on crispness.
Does cold fermentation make the crust crispier?
Cold fermentation mainly develops flavor and can make scheduling easier. It is not a stand-alone requirement for crispness; the bake and drying phase still matter.
Why does bread burst at the side?
Common causes include under-proofing, insufficient early steam, or scoring that did not direct expansion. The surface needs to stay flexible while the score gives the loaf a controlled opening.
How long should bread cool before slicing?
Give a larger loaf at least about an hour, and very large loaves longer. The important point is to let the crumb stabilize and avoid trapping steam against the crust.
Is a Dutch oven better than a baking stone?
For one home loaf it is often easier because it creates its own enclosed steam environment. Stone or steel is excellent for baguettes and free-form loaves, but steam has to be managed separately.