Homemade bread: start with a formula, then read the dough
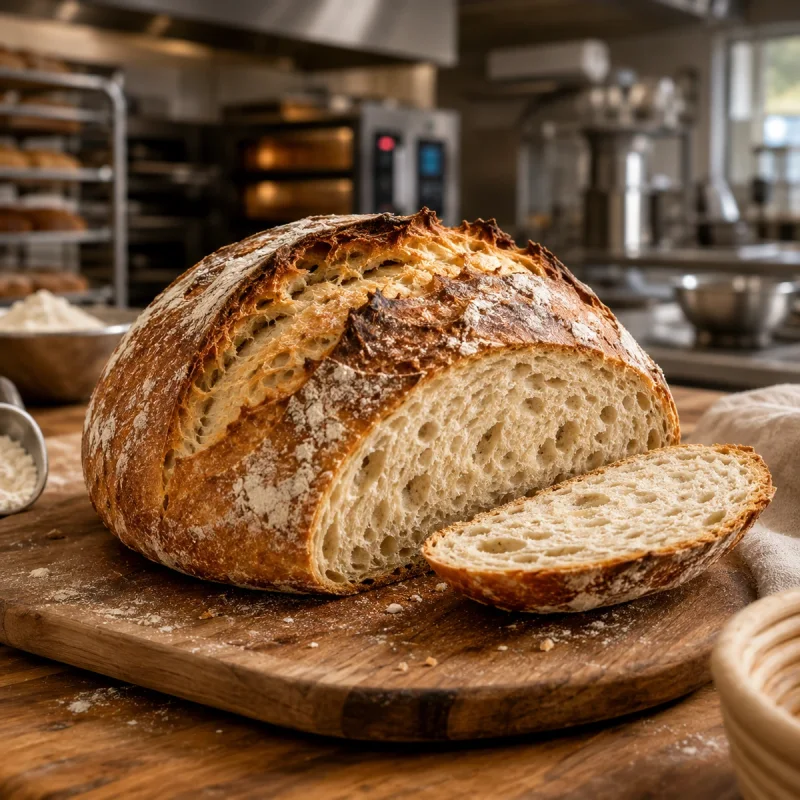
For homemade bread with a soft, airy crumb and crisp crust, following the clock is not enough. You need a hydration your flour can support, enough dough strength, controlled fermentation, and a bake that uses steam early but finishes in a dry environment.
Use this as a starting formula for one medium wheat loaf. It is not universal: different flours absorb different amounts of water, so with an unfamiliar flour it is smarter to hold some water back at first.
| Ingredient | Amount | Baker's % |
|---|---|---|
| wheat bread flour | 500 g | 100% |
| water | 350 g | 70% |
| salt | 10 g | 2% |
| instant yeast | 5 g | 1% |
If you use fresh yeast, about 15 g fresh yeast is a practical starting conversion for this formula. For another type of dry yeast or a much longer fermentation, follow the manufacturer's guidance and adjust the dose to the process.
With an unfamiliar flour, begin with about 330 g water and add the final 20 g only if the dough still has enough strength after its initial development. Professional bakers adjust hydration to the flour in front of them. More water does not automatically mean better bread. Here, 70% hydration is a controlled starting point for an everyday wheat loaf, not a target to hit at any cost.
1. Mix the dough without automatically adding more flour
Combine the flour, about 330 g water, yeast, and salt until there are no dry pockets. Let the dough rest for about 20 minutes, then reassess the texture and gradually add the remaining water only if the dough can support it.
The dough can be moist and slightly sticky, but it should stay cohesive. Adding extra flour immediately to “fix” stickiness lowers hydration and often produces a tighter crumb. On the other hand, if the dough still spreads completely after resting and developing strength, there is no need to force in all the planned water.
You can build strength with a few minutes of kneading or with several gentle folds during bulk fermentation.
Good signal: the dough becomes smoother, stretches when lifted, and holds a rounded shape for a while after folding. Poor signal: the edges tear immediately, the dough feels dry and rigid, or it spreads into a flat layer with almost no tension.
2. End bulk fermentation by dough progress, not by the clock
For many wheat breads, a final dough temperature of about 24–26°C / 75–78°F after mixing is a useful professional starting range for predictable fermentation. It is not a universal requirement. Warmer dough generally ferments faster; cooler dough more slowly.
With this formula, bulk fermentation at ordinary room temperature will often fall somewhere around 60–120 minutes, but time is only a guide. Move on when the dough is visibly airier, the surface has some tension, and gas pockets are appearing near the sides of the bowl. Do not wait automatically for a perfect doubling in volume.
If the dough barely moves, do not add more yeast blindly. Check dough temperature, yeast condition, and the formula first.
3. Shape without pressing out all the gas
Turn the fermented dough onto a lightly floured surface. Gently pre-shape it and let it relax for 15–20 minutes. Then shape the loaf to create a smooth, tensioned outer surface without squeezing out all the internal gas.
The goal is to redistribute some of the largest irregular bubbles while preserving enough gas for a lighter crumb. If the dough constantly slides over a heavy layer of flour, surface tension is harder to build. If you compress it aggressively, the crumb will be tighter.
4. Final proof: well aerated, but still stable
Cover the shaped loaf and let it proof. 45–75 minutes is a useful starting window for this formula, but the condition of the dough matters more than the time.
The loaf is ready when it is visibly inflated with gas but still holds its shape. After a very gentle press, the indentation should return slowly and only partly. If it springs back immediately, it likely needs more time. If the dent remains deep and the surface looks loose or wrinkled, proofing may have gone too far.
The poke test is not a standalone laboratory test. Hydration, dough temperature, flour, and surface tension all change the response, so judge the whole loaf as well as the indentation.
5. Bake with steam first, then finish dry
Preheat the oven thoroughly. For a medium wheat loaf, 230–240°C / 445–465°F in a conventional oven is a useful starting range. If you bake on a stone, steel, or heavy tray, the baking surface also needs to be fully preheated.
Score the loaf immediately before baking. For roughly the first 15–20 minutes, a humid baking environment helps keep the surface extensible and supports oven spring. Then vent the steam or remove the lid and continue in a drier environment, often around 210–220°C / 410–430°F, until the crust is evenly and deeply browned.
A loaf this size will often take about 35–45 minutes in total, but time should never be the only doneness test. Shape, actual oven temperature, and dough composition can shift the bake considerably.
Why steam improves a crisp crust
Steam is most useful early in the bake. A moist surface does not set too quickly, allowing the loaf to expand during oven spring. At the same time, surface starch hydrates and later sets into a thinner, smoother crust.
But steam that stays too long works against crispness. Once the main expansion is complete, the surface has to lose moisture. The professional logic is therefore steam early, dry finish.
How to tell whether the crumb is baked through
Crust colour alone is not enough. A large loaf can brown quickly while the centre is still unstable. Use several signals together:
- the crust feels firm and dry,
- the loaf keeps its shape when lifted,
- the bottom is not soft or damp,
- if you use a probe, measure in the actual centre rather than near the crust or pan,
- judge the final crumb only after the bread has cooled completely.
Cooling is the final stage of the recipe
Hot bread still contains a great deal of water vapour. As it cools, moisture redistributes and the crumb structure firms. Cutting too early can compress the still-soft cell walls and make the crumb seem gummy or underbaked even when the loaf was baked sufficiently.
Cool the loaf on a wire rack so air can circulate underneath. Do not seal warm bread in a bag or container.
Troubleshooting: what the sliced loaf tells you
| Symptom | More likely cause | What to check next time |
|---|---|---|
| uniformly dense crumb | dough too dry, insufficient strength development, or under-fermentation | stop adding flour automatically; check hydration, dough strength, and bulk progress |
| large cavities under the top crust with dense crumb below | final proof too short or shaping too rough | extend final proof based on dough signals and redistribute the largest gas pockets more evenly |
| loaf spreads and has little oven spring | hydration too high for the flour, weak structure, or over-proofing | hold back some water, strengthen the dough earlier, or shorten fermentation |
| dark crust but gummy crumb | surface browned faster than the centre or bread was cut too hot | reduce heat after initial browning and cool completely before slicing |
| crust softens quickly after cooling | not enough dry finishing time or trapped steam | finish the bake without steam and cool on a rack |
| loaf collapses or wrinkles after baking | over-proofing or an interior that was not yet stable | reassess final proof and actual doneness |
What changes when you use a different flour?
This base formula is intended mainly for wheat flour with enough strength for bread. With a softer flour, hold back some of the water. Whole-grain flour often absorbs more water, but bran also changes gluten development. Rye and gluten-free doughs rely on different structural systems, so do not transfer this ratio to them as a universal formula.
Short version: a repeatable homemade bread method
Start with 500 g flour, 350 g water, 10 g salt, and 5 g instant yeast, but hold back some water when the flour is unfamiliar. Develop the dough until it is cohesive and elastic. End bulk and final proof by visible dough signals rather than by the clock alone. Use steam early for expansion and crust development, then finish the bake dry. Cool completely before slicing.
Most important: when the result is not right, change one variable at a time on the next bake. That turns a recipe into a repeatable process instead of a matter of luck.
Diagnostics
Common problems and solutions
Uniformly dense crumb.
Cause: Dough too dry, insufficient strength development, or under-fermentation.
Solution: Do not add flour automatically; check hydration, dough strength, and bulk progress.
Large cavities under the top crust with dense crumb below.
Cause: Final proof too short or gas redistributed unevenly during shaping.
Solution: Extend final proof based on dough signals and redistribute the largest gas pockets more evenly.
The loaf spreads and has little oven spring.
Cause: Hydration too high for the flour, weak structure, or over-proofing.
Solution: Hold back some water, strengthen the dough earlier, or shorten fermentation.
Dark crust but gummy crumb.
Cause: Surface browned faster than the centre or the loaf was sliced too hot.
Solution: Reduce heat after initial browning, bake through, and cool completely.
Crust softens quickly after cooling.
Cause: Not enough dry finishing time or trapped steam.
Solution: Finish without steam and cool on a wire rack.
Technical terms
Terms worth understanding
- Baker's percentages
- A formula system in which total flour weight equals 100% and every other ingredient is expressed as a percentage of flour weight.
- Hydration
- The amount of water relative to flour weight. 350 g water with 500 g flour equals 70% hydration.
- Bulk fermentation
- The period after mixing and before shaping when the dough develops gas, flavour, and structure.
- Final proof
- The last fermentation of the shaped loaf before baking.
- Dry finish
- The phase after early steam when moisture is allowed to leave the oven so the crust can set and become crisp.
Frequently asked questions
Answers to common questions
Why is my homemade bread dense?
Start with three common causes: hydration was reduced by adding extra flour, the dough did not develop enough strength, or fermentation ended too early. A dry, rigid dough is not fixed simply by proofing longer.
Does bread dough always need to double?
No. Doubling is not a universal endpoint. Move on when the dough is visibly airier, shows gas pockets, and still has useful tension.
How do I get a crisp crust?
Preheat the oven thoroughly, use steam early, then finish in a dry environment. Cool the loaf on a wire rack.
Why is the crumb gummy?
Possible causes include an underbaked centre, a crust that browned too quickly, or slicing while the loaf was still hot. Judge it only after full cooling.
Can I always use 350 g water with 500 g flour?
No. 70% hydration is a starting point. Flour absorption varies, so hold back about 20 g with unfamiliar flour and add it only if the dough can support it.