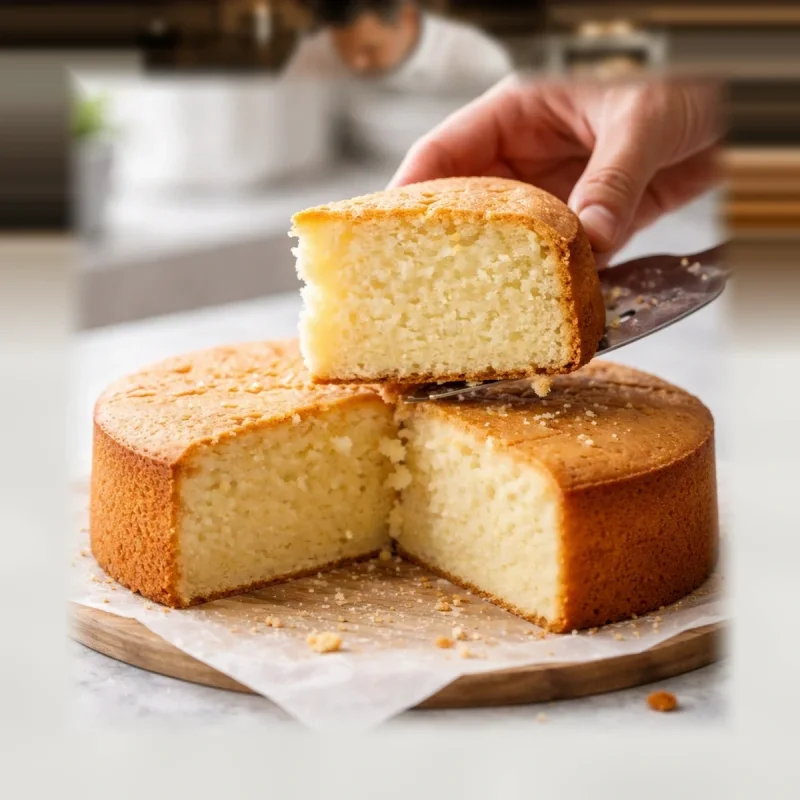
Fluffy sponge cake without guesswork: three things control the rise and crumb
A fluffy sponge cake depends on three linked steps: creating enough fine air bubbles in the egg foam, keeping as much of that air as possible while the flour is folded in, and baking until the internal structure is firm enough to support the expanded cake. In egg-foam sponges, the key control points are therefore the finished egg foam, gentle incorporation of the dry ingredients, and actual doneness. If the cake is dense, sinks in the centre, or has a gummy or sticky crumb, the cut surface often tells you where the process went wrong.
This guide focuses on egg-foam sponge cakes and genoise-style cakes, where much of the volume comes from whipped whole eggs or egg whites. In English-language baking, “sponge cake” can also refer to butter-based cakes, so the distinction matters. There is no single baking temperature or time that is correct for every sponge: formula, batter depth, pan size and material, and oven mode all change how quickly the centre sets.
1. Egg foam: judge the batter, not the clock
A well-developed foam contains fine air bubbles that are stable enough to survive flour incorporation and the early part of baking. A fixed number of minutes is therefore less useful than a visual endpoint.
When whole eggs and sugar are whipped together, the ribbon stage is a practical checkpoint. Lift the whisk: the mixture should fall back in a broad ribbon and remain visible on the surface briefly before blending in. The foam should be pale, noticeably increased in volume, and thick enough that flour does not immediately sink to the bottom.
If the recipe uses separately whipped egg whites, follow the peak stage specified by that formula. Soft, medium and stiff peaks are not interchangeable. Very dry, over-whipped whites can be harder to incorporate evenly and may leave clumps of foam or larger irregular air pockets.
Room-temperature eggs generally whip more readily in foam-style cakes, but the final state of the foam matters more than temperature alone.
2. Fold in the flour without crushing the foam
Once flour is added, the goal changes. You are no longer trying to beat the mixture; you are trying to distribute the flour evenly with the least mechanical work necessary.
Sift the flour mainly to remove lumps so it can be incorporated quickly. Add it in two or three portions. Use a broad spatula to reach down to the bottom of the bowl, lift the batter over itself, and rotate the bowl as you work. Avoid smearing the batter against the side of the bowl or stirring rapidly in tight circles.
Volume is a useful control signal. After the flour is folded in, the batter should still look aerated and thick. If it suddenly becomes runny and loses a large share of its original volume, the folding was probably too aggressive or continued too long.
3. If the formula contains butter or oil, do not simply pour it into the foam
Fat is more difficult to incorporate into an egg foam than dry flour. In genoise-style methods, a reliable approach is to mix a small portion of the finished batter with lukewarm melted butter or the recipe's fat first, then gently fold that mixture back into the main batter. This distributes the fat with less additional mixing and reduces the risk of collapsing the foam.
This is not a universal rule for every sponge cake. If a specific formula uses a different mixing method, follow that method. The underlying principle is simple: the more mixing you need after the foam has been created, the more trapped air you risk losing.
4. Baking: the cake must expand and then set in time
In the oven, trapped air and water vapour expand while egg proteins and starch gradually form a structure strong enough to hold the crumb. A successful sponge depends on expansion and setting happening in the right sequence.
That is why “bake at X temperature” is not a complete rule. If the oven is too hot for the formula, batter depth and pan, the outside may set long before the centre. If the oven is too cool, the cake can remain structurally weak for too long and lose unnecessary moisture. Fan/convection ovens and conventional ovens also transfer heat differently, so settings are not always interchangeable.
Avoid opening the oven early while the centre is still fluid and weak. Near the end, use several doneness signals together: the surface is evenly baked, the centre springs back after a light touch, a skewer does not carry raw batter, and the edge may just begin to pull slightly from the pan. No single test is perfect for every sponge formula.
5. Pan size changes the bake even when the recipe does not
Batter depth matters. The same quantity in a wider pan forms a shallower layer that heats through more quickly and loses moisture faster. In a narrower pan, the centre is deeper and needs more time to become stable.
When changing pan diameter, do not automatically keep the same baking time. Watch the batter depth and the doneness signals. Scaling ingredient quantities for another pan size is a separate problem from understanding the egg-foam structure itself.
6. Use the cut crumb as a diagnostic tool
Perfectly identical pores are not the goal. A properly baked sponge has small, naturally slightly irregular air cells, without large voids, wet bands or a dense gummy layer at the bottom.
| Symptom after cooling | Most likely stage to investigate | What to check next time |
|---|---|---|
| Low cake with an evenly dense crumb | foam development or folding | Did the eggs reach the intended foam stage, and did the batter lose a lot of volume after the flour was added? |
| Sunken centre with higher edges | structure setting during baking | Was the centre still soft at the end of baking, or was the oven opened too early? |
| Dense or gummy layer at the bottom | uneven incorporation or batter settling | Was flour or fat left at the bottom of the bowl? Did the batter sit too long before baking? |
| Large holes or tunnels | uneven foam or poorly combined batter | Were there large clumps of foam or pockets that were never fully incorporated? |
| Dry edge with an otherwise good crumb | bake time, heat or surface-area ratio | Was the pan too large for the batter quantity, or was the cake baked longer than necessary? |
| Wet or sticky centre | incomplete baking or formula imbalance | Was the centre actually set when the cake left the oven, and is the liquid-to-dry balance appropriate for the formula? |
7. Cooling: stabilise the cake without drying it out
Cooling technique depends on the type of sponge and the pan, so there is no single method for every cake. For a typical egg-foam layer cake, release it according to the recipe after a short rest and cool it fully on a rack so steam does not condense under the base. Do not slice it warm: warm sponge is softer and easier to compress or tear.
If the sponge is intended for a layered cake and is naturally on the leaner side, moisture is often adjusted later with syrup or another liquid during assembly. That is very different from trying to rescue an underbaked or structurally unstable centre.
What to remember for your next sponge cake
- With whole eggs, look for a clear ribbon stage instead of chasing an exact mixing time.
- Whip egg whites only to the stage the formula requires; the stiffest possible foam is not automatically the best.
- Fold flour in portions and stop as soon as there are no dry pockets.
- Incorporate fat according to the formula; for genoise, pre-mixing the fat with a small amount of batter can make folding safer.
- Open the oven only after the structure has begun to set, and judge doneness using several signals.
- Treat the cut crumb as feedback: a dense bottom layer, large holes, a sticky centre and dry edges point to different problems.
Frequently asked questions
Answers to common questions
Why does sponge cake sink in the middle?
First check whether the centre was truly set at the end of baking. If the edges remain stable but the centre drops during cooling, the internal structure may have been too weak; opening the oven too early and unstable foam can increase the risk.
How do I know when whole eggs and sugar are whipped enough?
Use the ribbon stage: the mixture should be pale and expanded, then fall from the whisk in a broad ribbon that stays visible on the surface for a few moments.
Can overmixing after adding flour ruin a sponge cake?
Yes. Once the flour is added, the goal is even distribution without dry pockets. Prolonged or aggressive mixing knocks out air and produces a lower, denser cake.
Why is there a dense or gummy layer at the bottom?
A heavier part of the batter may have settled or remained unevenly incorporated. Check for flour or fat at the bottom of the bowl, long holding time before baking, and major volume loss during folding.
Should a good sponge cake have perfectly even air holes?
No. A good crumb has fine, naturally slightly irregular cells. Large voids, tunnels, wet bands or a dense compact layer are the warning signs.
Why are the edges dry when the middle looks good?
That more often points to pan size, excessive bake time or strong heat transfer than to poor egg foam. Check the pan, how your oven behaves and when the centre had already become fully baked.