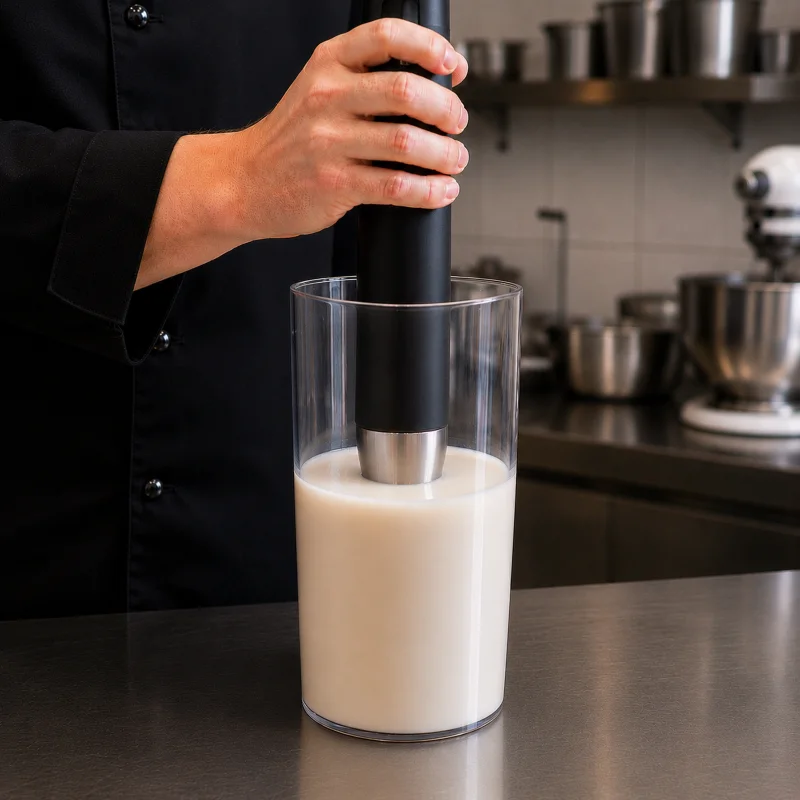
For almond milk with as little foam as possible, control how much air the blender pulls into the liquid. Keep an immersion blender head below the surface, or use only enough speed in a countertop blender to keep the almonds moving without forming a deep funnel. After blending, let the milk stand for about 10 minutes, strain it gently, skim any persistent surface foam, and weigh it only after the foam has settled.
Why does almond milk foam while you make it?
A thick layer of small bubbles can appear on freshly blended almond milk within seconds. The main cause is not the almond itself but the air drawn into the liquid by fast-moving blades. In vegan baking, that foam can matter: it increases the apparent volume of the liquid, can leave air pockets in thin creams or glazes, and makes the actual amount of water harder to measure accurately.
Almond proteins and other surface-active components can adsorb at the air-water interface and slow bubble collapse. Fine fat and solid particles also affect flow and texture, but they do not by themselves explain persistent foam. The deeper the vortex, the easier it is for the blades to keep drawing in new air.
The goal is not to remove every microscopic bubble. Well-prepared almond milk should settle to a mostly smooth surface without a thick, persistent cap of foam.
How do you make almond milk while introducing as little air as possible?
Soak the almonds in clean cold water and keep them refrigerated while soaking. A practical range is 8 to 12 hours. Drain and discard the soaking water, rinse the almonds, and blend them with fresh water.
For pastry work, two useful starting ratios are:
- 100 g almonds to 300 g water for a richer milk with more almond solids;
- 100 g almonds to 400 g water for a lighter liquid that is easier to incorporate into cake and muffin batters.
These are starting points, not universal formulas. A richer milk contributes more fat and solids, while a thinner milk contributes a greater proportion of water. Match the final ratio to the recipe in which the milk will be used.
With an immersion blender, use a tall, relatively narrow container. Keep the blender head fully submerged, usually at least 2 to 3 cm below the surface. Switch it on only after it is in the liquid, and do not lift it toward the surface while it is running.
Start at a lower speed. Break down the almonds in short 10 to 15 second intervals and check the texture between intervals. Total blending time depends on blender power, almond hydration and batch size. Stop when the liquid is evenly opaque and no large hard almond pieces remain.
Longer blending is not automatically better. Once the almonds are fine enough, continued high-speed mixing mainly adds heat and gives the blender more time to pull air into the liquid.
How do you prevent a deep vortex in a countertop blender?
Use a jar that is not much larger than the batch. When the liquid level is too low for the jar, the blades can create a deep funnel that continuously feeds air toward the blade zone.
Start at the lowest useful speed and increase only until the almonds circulate through the blades. A vortex that extends almost to the blades is a sign that the speed is too high or the batch is too small for that jar.
Keep the lid closed while the blender is running and never insert a spatula into moving liquid.
How should you strain almond milk without creating more foam?
After blending, leave the milk undisturbed for about 10 minutes. Larger bubbles will rise and some of the fine foam will start to collapse. Do not stir the foamy layer back into the milk before straining.
Pour slowly through a fine nut-milk bag or a tightly woven clean cloth. Let the stream run down the inside of the filter or the side of the receiving bowl rather than falling from height into the centre. A falling stream entrains more air.
Press the almond pulp steadily and moderately. Aggressive twisting can force the liquid through the cloth in many thin jets and disturb fine solids, which can create more foam and sediment.
After straining, skim off any persistent foam with a wide spoon. Do not whisk it in an attempt to destroy it; that simply divides the bubbles into smaller ones.
If you are not using the milk immediately, refrigerate it promptly.
Why is weighing more accurate than measuring by volume?
Foamy almond milk occupies more volume in a measuring jug than the liquid itself. If a recipe calls for 200 ml and part of that reading is foam, the batter receives less actual liquid than intended.
For technically sensitive pastry, weigh the almond milk. For everyday kitchen use, 1 g of almond milk can be treated as roughly 1 ml as a practical starting approximation, but the density changes with almond concentration, suspended solids and added ingredients.
Weighing matters most for small quantities, richer homemade milk and recipes where a 10 to 20 g difference in liquid noticeably changes batter viscosity.
What does almond milk actually do in vegan baking?
Almond milk mainly contributes water, a small amount of fat and suspended almond solids. Use it to manage batter consistency; do not treat it as a stand-alone egg replacer.
For binding, vegan fats and browning, use ingredients chosen for those specific functions. In markets where the related PEK guide is available, see the guide to vegan baking and replacing eggs, butter and milk.
Calm liquid matters especially in chia mixtures. Small bubbles can become trapped around hydrated seeds, making the mixture look thicker before the chia has finished binding water. Let the almond milk settle, weigh it, and only then combine it with the seeds.
Where do bubbles cause the most trouble?
A few tiny bubbles in a thick cake or muffin batter rarely cause a visible fault because the liquid will later be mixed with flour, fat and leavening. A thick cap of foam can still distort measurement.
The effect is more noticeable in:
- thin glazes and pourable coatings, where bubbles remain visible on the surface;
- smooth creams and puddings, where air can become trapped as the mixture thickens;
- chia gels, where bubbles cling around hydrated seeds;
- fluid mixtures that should not be mixed aggressively after preparation;
- recipes with a very small total amount of liquid.
If the milk is foamy, let it stand first, remove the surface foam, and only then weigh the amount you need. When adding it to a mixture, pour it in a thin stream down the side of the bowl and mix only until combined.
How can you tell when almond milk is ready for pastry use?
After about 10 minutes of rest, the surface should be mostly flat. A few tiny bubbles around the edge are not a problem, but there should not be a thick pale cap in the centre.
When you tilt the container gently, the milk should move as a single liquid rather than as a liquid layer under a separate foam layer. Fine almond sediment is normal in homemade almond milk and is not the same as foaming. Stir slowly or turn the container gently a few times before use.
Do not shake it immediately before weighing. That would reintroduce the air you just worked to remove.
Diagnostics
Common problems and solutions
A thick foam layer remains on the surface for several minutes.
Cause: The blender is creating a deep vortex or the immersion blender head is too close to the surface.
Solution: Use a taller, narrower vessel, fully submerge the head and start at a lower speed.
The milk foams strongly again after straining.
Cause: The liquid is falling from height or the filter bag is being twisted and squeezed aggressively.
Solution: Pour down the side of the filter and press the pulp steadily without sudden twisting.
The batter is thicker even though the requested volume of milk was measured.
Cause: Part of the measuring-jug volume was foam, so there was less actual liquid than expected.
Solution: Remove the foam, let the milk settle and use a scale for sensitive recipes.
Sediment appears on the bottom, so the milk is shaken hard.
Cause: Normal settling of almond particles is being mistaken for a failed emulsion.
Solution: Stir slowly or turn the container gently a few times without reintroducing air.
Technical terms
Terms worth understanding
- Aeration
- Introducing air into a liquid or mixture during blending, whipping or pouring.
- Vortex
- A funnel-shaped flow above the blades through which a blender can continuously draw in air.
- Emulsion
- A dispersion of fine fat droplets in a water phase; homemade almond milk is less stable than industrially homogenized products.
- Sedimentation
- The natural settling of fine almond particles during rest.
Frequently asked questions
Answers to common questions
Do I need to peel the almonds first?
No. Blanched almonds make paler milk with fewer visible particles, while the skins can contribute darker colour and more sediment.
Can I use store-bought almond milk?
Yes. Choose an unsweetened neutral product, check the ingredients and let any foam settle after shaking before you weigh it.
Is almond milk suitable for people with nut allergies?
No. Anyone allergic to almonds or tree nuts should use a plant liquid that is known to be safe for that individual.