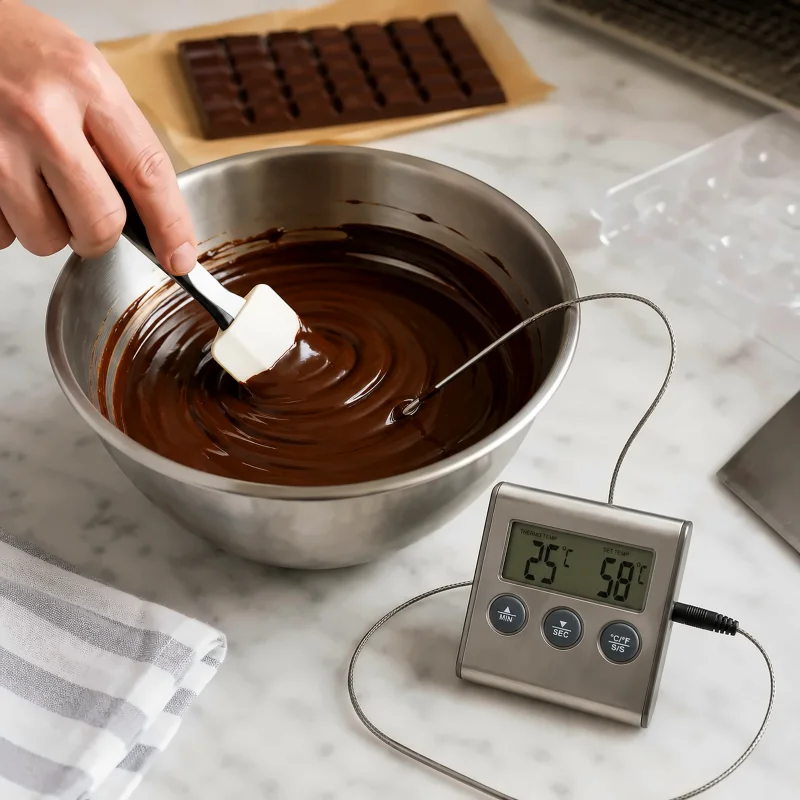
A glossy finish and clean snap begin with controlled crystallisation
Why melted chocolate turns grey or stays soft as it cools
Chocolate may look smooth in the bowl but lose its shine, develop pale streaks or remain soft a few minutes after coating. The problem is not simply slow cooling: cocoa butter has crystallised without sufficient control. Melting alone is not tempering. To put this right, melt the chocolate fully, introduce stable crystals, then bring it to its correct working temperature. An even shine, prompt setting, a firm surface and a clear snap together indicate success.
Cocoa butter can form several crystal structures as it cools. They differ in stability, melting point and firmness, so two chocolates at the same temperature need not be equally well tempered. The aim is to encourage stable form V crystals, which give chocolate its firm texture, smooth surface and slight contraction as it sets.
Unstable crystals can change over time. Fat then migrates towards the surface and produces a greyish, streaky coating known as fat bloom. Shine on its own is not proof of temper: the chocolate must also set evenly, feel firm and snap cleanly.
This guide is for plain chocolate or couverture intended to form firm shells, bars or decorations. Ganache and soft cream-based glazes behave differently because the emulsion and recipe composition matter more than tempering; see the guide to smooth, stable chocolate ganache and glossy chocolate glaze guide.
Choosing chocolate for tempering
Choose chocolate that contains cocoa butter. Couverture usually contains more cocoa butter than an ordinary chocolate bar, making it more fluid and better suited to thin, even moulded shells.
Shape is not a reliable guide. Couverture callets are small discs or drops designed to melt evenly and can be tempered just like block couverture. Bake-stable chocolate chips are formulated to keep their shape in biscuits and cakes. They often melt into a thicker mass and may not be suitable for thin praline shells, bars or delicate decorations. Check the ingredients and stated purpose, not just the shape.
Compound coating made with vegetable fats follows a different setting process and does not use the same cocoa-butter tempering curve.
Keep flavour development separate from tempering. Coffee, salt, toasted nuts and suitable flavourings can deepen chocolate flavour, but additions must not introduce water into chocolate destined for shells or decorations.
For home seeding, the method determines how much chocolate to add
A thermometer that can track small changes matters
You do not need a tempering machine. Have a completely dry bowl, silicone spatula, scales, sharp knife and a responsive digital thermometer ready.
Choose a thermometer with a stated accuracy and check or calibrate it occasionally. It needs to register small changes reliably across roughly 25–55 °C; no single resolution or error specification suits every thermometer.
Melt the chocolate in a microwave or over a bain-marie. In a microwave, heat in 10–15-second bursts, stirring thoroughly each time. Over hot water, the bowl must not touch the water and steam must not enter around its rim.
Keep all utensils dry. Even a few drops of water can dissolve the surface of sugar particles, causing them to clump into a thick, grainy mass.
Melting, cooling and working temperatures
| Chocolate | Fully melt | Cool | Working temperature |
|---|---|---|---|
| Dark | 50–55 °C | 28–29 °C | 31–32 °C |
| Milk | 45–50 °C | 27–28 °C | 29–30 °C |
| White | 45–50 °C | 26–27 °C | 28–29 °C |
These are common starting points from Valrhona's professional tempering curves. Some Callebaut couvertures use different stages. Follow your product manufacturer's curve and seeding instructions whenever provided. Cocoa butter, milk fat and sugar proportions affect working temperatures; different seeding methods also use different amounts of unmelted chocolate.
Heat milk and white chocolate more gently. Excessive heat or prolonged heating can make them thicken unevenly, turn grainy, darken or smell of overheated milk or caramel. That is heat damage, not crystallisation.
The classic full-cooling seeding method
First melt the chocolate completely. Add solid, already-tempered chocolate a little at a time while stirring, bringing the mixture down to the cooling temperature in the table. Finally, rewarm it gently to the working temperature.
Prepare finely chopped chocolate or couverture callets for seeding. This is a supply to add as needed, not a compulsory quantity or universal percentage. Add small portions, stirring gently between each. Stop adding when the mixture reaches its cooling target. The amount used depends on room temperature, piece size, the temperature of the initial melt and the couverture formula.
If a manufacturer specifies a fixed proportion of callets or direct seeding at the working temperature, use that method in full. Do not mix its quantities or temperature stages with the full-cooling method.
Stir the edges and bottom as well as the centre: cooler pieces left there can give a misleading thermometer reading. At the cooling target, remove any unmelted chunks. Warm the mixture carefully to the working range: use 3–5-second microwave bursts, or place the bowl briefly over warm water. Stir and measure again after every burst.
Do not skip this final step, and do not overshoot. Even a small rise above the upper working limit can dissolve some stable crystals. Keep stirring without whisking, to equalise temperature, distribute crystals and avoid a thick layer forming at the cooler rim.
Keep chocolate in temper with small adjustments while you work
Distinguish chocolate that is too cold from over-crystallised chocolate
Tempered chocolate continues to crystallise during use. Its temperature gradually falls while its viscosity increases. If it stops flowing from the spatula in a smooth ribbon and starts falling in thick folds, measure its temperature first.
Below the working range: the chocolate is too cold. Warm it in very short steps, stir thoroughly and measure again. Stop as soon as it returns to the working range.
Still within the working range but increasingly thick: the chocolate has developed too many crystals. This is over-crystallisation. Further cooling or adding more solid chocolate will make it worse.
To correct it, add tiny amounts of the same fully melted, untempered chocolate. Let each addition cool enough beforehand that it cannot push the whole batch above the working limit. Stir thoroughly after each addition, adding another only if necessary. Stop when the chocolate flows in a smooth continuous ribbon and remains at working temperature.
There is no universal percentage: the quantity depends on crystal density, the couverture's viscosity and the batch size. If the mixture overheats or the test smear stays blotchy and soft, stop adjusting; melt everything fully and temper again. Do not add oil, butter or water, which change the fat balance, shell firmness and setting behaviour.
A spatula test reveals what the thermometer cannot
Spread a thin smear on the tip of a knife, metal spatula or baking parchment. At a moderately cool room temperature, correctly tempered chocolate should start to lose its wet appearance evenly within a few minutes. The exact time depends on the type, thickness and room conditions.
The set surface should look even, glossy and firm, without grey streaks, soft patches or greasy edges. Milk and white chocolate show less obvious shine, so also check that the set film does not smear or leave an oily mark when touched.
A correct temperature does not prove a correct crystal structure. Insufficient mixing, too few stable crystals or reheating can leave a soft smear even when the thermometer shows the target reading.
A refrigerator cannot fix incorrect tempering
Allow moulded pieces to begin crystallising for a few minutes in a cool room, then chill briefly if needed. Prolonged refrigeration or freezing creates a large temperature difference; when cold chocolate returns to a warmer room, condensation can form and cause sugar bloom and lost shine.
Bars and pralines should contract slightly away from the mould. If fully set chocolate still sticks, it may be incorrectly tempered, the mould may be dirty, or cooling may have been uneven. Polish the mould with a clean soft cloth before filling and avoid touching the inside, as fingerprints can transfer fat marks to the surface.
Ganache and soft glazes are different systems
Tempering mainly matters for solid chocolate shells
Temper chocolate for bars, pralines, delicate decorations, firm shells and coatings that should stay shiny and solid at room temperature. Ganache contains liquid from cream: a stable emulsion, not tempering, is the priority in smooth chocolate ganache. The same distinction matters for lump-free chocolate glaze. With truffles, temper the outer coating, not the soft centre.
Fix failed crystallisation by melting and starting again
What to do when the test smear stays streaky or soft
If the test smear remains wet-looking, soft or grey-streaked beyond the normal setting time for that couverture, reheat all of the chocolate to its complete melting temperature. This dissolves the wrongly formed crystals and resets the process.
Add fresh tempered seed chocolate, cool again and rewarm to working temperature. Adding a few chips to a nearly set but wrongly tempered batch is not a shortcut: the existing crystal structure must be melted out first.
A dull surface does not always have one cause. Incorrect tempering, condensation, a dirty mould and handling marks can all contribute; use the guide to dull chocolate glaze and restoring shine to distinguish them.
Before coating or moulding, repeat the spatula test. Once a thin film sets evenly within a few minutes without grey streaks and becomes firm, hold the chocolate inside its working range and use it without unnecessary delay.
Diagnostics
Common problems and solutions
Chocolate is too cold and thick
Cause: Temperature is below the working range.
Solution: Warm in very small steps, stirring and measuring again.
Chocolate thickens at the correct temperature
Cause: Too many cocoa-butter crystals have formed.
Solution: Gradually add small amounts of the same fully melted untempered chocolate.
Test smear remains soft or grey
Cause: The crystal structure is unstable or the chocolate has overheated.
Solution: Melt completely and repeat the full tempering process.
Frequently asked questions
Answers to common questions
How much solid chocolate do I need for seeding?
There is no fixed amount for all methods. Add it gradually until the cooling target is reached, or follow the manufacturer’s specific callet proportion and curve.
What are callets?
Callets are small discs or drops of couverture for easy portioning, even melting and tempering. They differ from bake-stable chocolate chips designed to hold their shape in the oven.
Can I temper chocolate without a thermometer?
It is much less repeatable. Use a responsive digital thermometer: small temperature differences can dissolve some stable crystals.
Why is the temperature correct but the chocolate still not setting shiny?
A thermometer does not identify crystal forms. There may have been too little mixing or seeding, or the chocolate may have been overheated again.